Category Archives: Photography

Summer Patio

Here is the front patio after the door was painted and the flowers planted and the bikes and skateboards and dogs gently removed.

This is what it looked like last summer.

Big changes, no?

We started the front landscaping by building the bank out of rocks and then the paver stone patio on top.  Stairs completed the big work.

Then, all that was left to do was fill the flower pots and the chairs and enjoy it!

One side of the front door.

And the other.

This is in early evening, but usually this is a hot and sunny south-facing spot.

The woods surrounding our house come right up to the bottom of the patio so you are surrounded by a halo of green at this time of day.

I just finished painting our front door with Annie Sloan Chalk Paint.  Primer Red.  I love it.  See the before picture above for the original color.

I’ve had the old whiskey barrels for a long time.  My parents used them as water barrels when I was growing up.

My grandma collected cream cans.  She painted them usually and I have one inside my front door with beautiful farm scenes on it.  This one she hadn’t gotten around to yet, and now I use it for flowers.

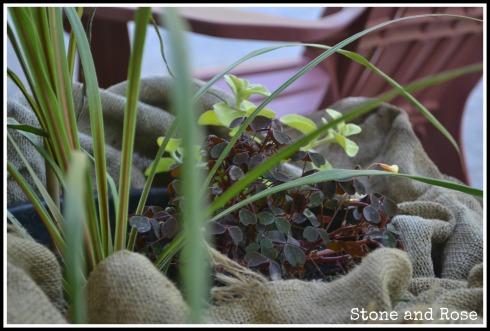
The whiskey barrels are bottomless, so I just planted flowers in a smaller sized pot and plunked it in there on  a piece of wood.  Burlap fills in the edges.

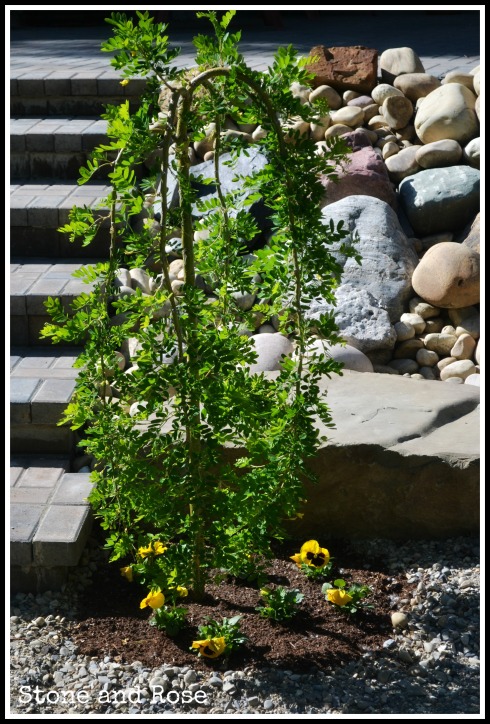
At the bottom of the steps we planted two weeping carragana.  They are so pretty in the summer and still interesting to look at in the winter too, which is kind of a big deal around here.  I can see hanging little lights on them at Christmas.

The yellow pansies planted underneath looked especially pretty until a couple of days ago.

When somebody decided to have a little snack.

Oh well, one side still looks un-chewed.

I didn’t want the stump by the driveway to feel left out, so it got a little yellow begonia.

The pots aren’t very spectacular looking just yet.  We just planted them last weekend and it actually froze here two nights ago, so our annuals are just getting started (sigh… our season in Alberta is so short).  But, the hanging pots are lovely now.

I’ll give you some updated pictures in July when the pots should have filled out a little more.

And…. one last shot…

Pin It
Supporting Habitat for Humanity


Stone and Rose Kitchen

The next stop in the house tour is the kitchen!  This is my favorite room in the house and was definitely the room that I put the most planning into when we designed it.

 We built our kitchen into the southeast corner of our house facing the front with big windows and lots of counter space.  We have a few uppers on the one wall, but our storage mostly comes from lots of lower drawers and cabinets.  Our cupboards are Ikea and we are very happy we went with them.  They were economical and great quality, too.


The door on the right hand side is the pantry.  I painted the inside part of the inner door with ASCP in Primer Red to make a chalkboard.  It is pretty darn handy here- we use it all the time… to draw skulls and remind each other to buy fish bait apparently!

The plates are antiques that my grandma had in her kitchen for years and the framed embroidery was made by my other grandma and is the Norwegian table grace.  I love that every time I open my pantry door I am reminded of them and their kitchens.

The south wall holds the sink and dishwasher and a couple of surprises…

…two of my addictions- TV and coffee!  We debated on whether to put a TV in here or not, but I really enjoy it!!  I just turn it on when I’m cooking or doing dishes or making lunches and then it doesn’t feel like such a chore!

The faucet is a touch control so you can turn it on with just a nudge of your arm when your hands are covered in raw chicken.  I can’t tell you how much I appreciate that.

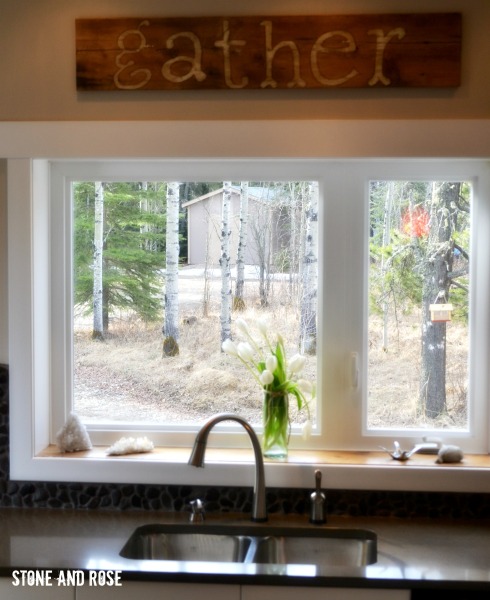
This is the view out of my sink window.  Towards the driveway so I can see who’s coming.  Bird feeder.  Shed.  Lots and lots of trees.  Pretty good view.

All of the window ledges in our house are very deep because we built with ICF (concrete forms).  Ten inches actually.  We used pieces of barn board from our floors for the bottom ledge portion of all of the windows.

By the sink I have two pieces of quartz crystal that my father-in-law gave us, tulips for spring, and rocks of course!!

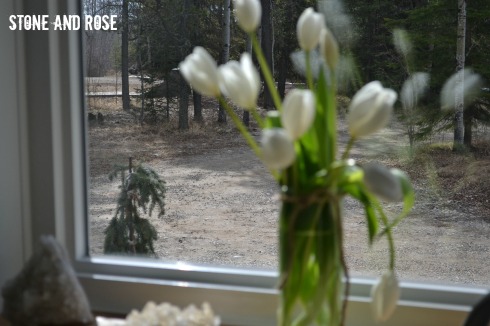
Looking out past the Norwegian spruce to the bike ramp so I can see what horrifying antics are going on out there!

But I prefer to focus on the flowers!

The countertops are quartz composite in a gray/ green color and the backsplash is pebble tile that we embellished using rocks from our own driveway to create a more natural, uneven top line to it.

I love these little measuring spoons.  I never use them… just for decoration.

We just got the new barn board sign put up above the sink.

The pendants over the island are red (which is kind of my go to choice for accent color).

The back wall with the stove, cupboards, and messy side of the fridge.

Here are the shelves we had room to squeeze in and pretty front to the fridge.  The shelves hold all of my cookbooks, the canisters for flour, sugar, etc., and some decor items.

Under the bench by the shelves I made some wire baskets with drop cloth inserts using the tutorial found here.  I’ll use them for potatoes and onions.

This is from the kitchen looking out to the living room.

Here’s the whole kitchen from the living room so you can see our table and benches as well.  Pottery Barn.  It was the big splurge and we did an awful lot of work on this house ourselves, so we went for it.  Love.

We didn’t originally plan on having stools at the island, but one ended up there, and we use it all the time!

The island is big and holds 3 sets of drawers by the stove for pots and pans, rice cookers, etc.  The side by the sink holds two cabinets/ slide outs for recycling, and the side closest to the stool holds bakeware and placemats and napkins.  We ended up with the little nook in the front, which is nice to decorate!

The paint color is General Paints Cartographic, which is a lovely kind of gray/ taupe.  The trim is all General Paints pure white.

I hope you enjoyed the tour of our kitchen!


Family History

This past Easter weekend, we went to my husband’s family’s for dinner and a visit.

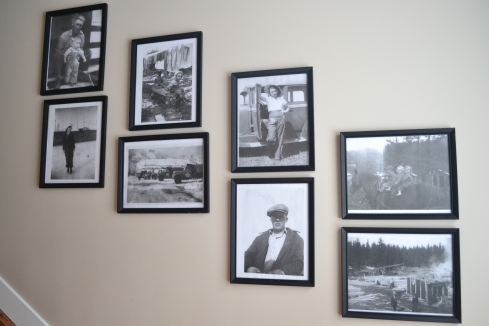
I have been asking for a while for pictures of his grandparents when they were young to go with the gallery wall I have featuring my grandparents when they were young and my parents were small.

Here is a picture of it so far.

I have pictures of my grandparents and their businesses (logging camp and trucking outfits) and then pictures of my parents when they were little.

I wanted the same thing for my husband’s family.

And I finally have some pictures to add!

This is his grandma in the mountains after she moved from the prairie.

I can imagine it was quite the change in scenery for her.

I love how there are always pictures with horses.

And speaking of, here is her husband on his horse, Silver.

Here they are together.

I also love how, in all the old pictures, after there are children, they are always included in the shots.

My mother-in-law with her dad.

Helping her dad with a swan (and you can see the beaver pelt in the background).

You can see how much my husband looks like his grandpa!

Here is my mother-in-law and her sister with dad skinning a bear in the background.

Isaac and the girls.

The girls.

With a beaver.
Grandma looks less thrilled than the kids.
 It will be fun to choose some of them to enlarge and add to the family gallery wall.
Do you have old photographs in your home?

Spring Break

This past week was spring break for us, so that meant that the boy and I had a week off.  Since Shaun had a long change (4 days off) in there too, we decided to go to Banff and do some skiing.

Well, actually, snowboarding, since I’m the only one who skis and since I hurt my back a while ago, I didn’t think I could do it.

So I curled up by the windows in the lodge at Lake Louise with a couple of books and magazines and a little school work and a good coffee, and the boys snowboarded.

You can see on the roof that we still have a lot of snow (they were actually shoveling the roof off) so the skiing was excellent still.

Here is my view from the lodge.

Not too bad, hey?

Here’s the boy all rosy-cheeked and inside for a quick lunch.

We took our nephew with us and they were, literally, the last two on the hill.

Then the beautiful drive back to Banff and dinner.

With views like this, it is definitely worth having a little more winter.

These are the cool animal crossings that are part of the Y to Y project (allowing animals to move around from Yellowstone Park to the Yukon Territory freely).

This is always the sign of a good holiday.  One worn out kid.  Guess it was the 6 trips to the water slides.  Or the snowboarding.  Or the hot springs.

What did you do on your spring break?


Photography 101- Rule of Thirds

Last week, Aimee’s lesson was on The Rule of Thirds and beginning composition for photography.

Basically, the picture should be divided into thirds both horizontally and vertically, and the subject(s) of the photo should be on (not in between as I previously thought) those lines or at the intersection of two of them.

Hmm! Who knew?

Here are my practice shots.

Unfortunately, I woke up to hoar frost here this morning. Beautiful. Great for pictures. But I’m really ready for green!!

You can see that the first picture had objects on the vertical (left) and horizontal (bottom) lines.

I thought this picture had a couple of horizontal lines covered. This is the view behind my house, by the way.

And I think this picture is a good example of her lesson on how diagonal lines create interest and movement. The tree on the left is a diagonal and the tree line fading off into the distance is also a subtle diagonal line as the tree line is moving away from the camera.

Such cool tricks!! We are going skiing this week and I’m going to practice her spring vacation tips on taking pictures in bright light and holiday pictures.


Photography 101- White Balance

I’m a little bit behind on my photography posts, but I have been working on it!

Last week, Aimee posted a lesson on white balance and it was something I really needed.

Basically, you can set your white balance manually, but to begin with, it is probably best just to get used to the camera settings and options for white balance to see what they can do first.

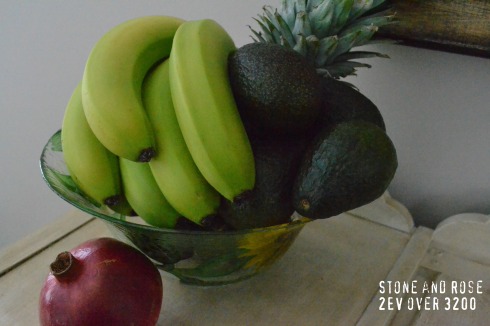
I used my camera in manual mode for these, as I’m getting quite used to it now.  I placed my props in a well lit corner of my living room (although it was cloudy) and started shooting, going through each of the options my camera has for white balance and then metering until I was balanced.

The auto worked quite well.

The setting for cloudy made it a bit too yellow and flash-y looking.

As did the flash setting.

The incandescent setting adds blue to make up for the yellow in incandescent lighting.  Since there wasn’t any, it turned quite blue!

Again, the shade setting added a bit of a flash looking yellow.

The setting for sunlight worked.  Which makes sense since that was what I was using- a naturally well-lit area.

It is so interesting to see and figure out what the camera will do for you in different types of lighting conditions.  I am going to keep practicing using my white balance options in different lighting conditions (use the incandescent in that type of light and see if the picture turns out, etc.).

Happy snapping!


ahem…spring?

Snow.  All day yesterday.  All night last night.  All day today.  So far all night tonight.

He is smiling because there were no buses running today and there probably won’t be for tomorrow, either.
Look at the piles of snow on the edge of our deck!!!  Our poor little Norwegian spruce is nearly buried!
I took a few more pictures and then played around with them in Pixlr as I guess I will have to get used to not using Picnik soon.  Sigh.
I was pretty happy.  Pixlr is way faster than Picnik, and while there aren’t as many options (although I didn’t take the time to explore everything), it can give you text and a nice frame as well as other effects.
 Does spring know it is supposed to be arriving in 3 weeks?

Photography 101- More Metering

To continue with the photography series, where I follow my photography guru Aimee from It’s Overflowing and her wonderful lessons, I spent more time on metering this past weekend.

I felt like my original metering assignment didn’t turn out that well (unlike the aperture, shutter speed, and ISO lessons, which turned out beautifully) and I thought I needed more practice on it.

Here’s what happened.

I learned how to meter on a bright background and then focus on an object to get a silhouette effect.

Can we just pretend for the next three pictures that my windows are clean?  Please?

Can you see the difference?  If you meter on the bright, snowy background, you get a darker image.  If you meter on the object, then the silhouette effect is lessened or removed.

So cool.

Then I used my Valentine’s Day flowers to play around with the aperture and try to get a blur effect.  Aimee did point out, though, that with a kit lens like mine, this may prove to be difficult as the aperture will only go so low in certain light conditions.

Then I took some pictures out my front door into the woods to experiment a little with focus.  In the first one I focused on the background.  Then I focused on the foreground in the second one.  The rest of the settings remained the same for both.

And I can never, ever resist taking pictures of new snow.  I just played with the meter until I found the effect I liked.

You should head over to Aimee’s to read her amazing step by step instructions and explanations and to see what the rest of her loyal followers have been working on.


Photography 101- Metering

This week, Aimee gave us one tough assignment.

Links:

Her wonderful lessons, which we have been following, have covered basics, aperture, shutter speed, and ISO so far.

This week she covered metering, and I’m not sure I’ve got it, but I’ll show you what I did, anyway.

Metering is when you set your camera for a certain aperture and then use the little scale you see in your viewfinder to ‘meter’ the picture.  In other words, to balance it using the best light (shutter speed and ISO) for your camera.  You set the ISO and camera will determine the shutter speed once you have metered/ balanced the scale using the manual dial.  See Aimee’s great post for a full explanation.

Here are my practice pictures with the aperture set at 5.6 and me just moving the ISO up and down and the shutter speed moving accordingly.

Now here are a couple of shots where I try to lower the aperture to create a blurred background.

The lowest I could get my aperture set to was 4.2 for some reason…

I guess I’m not sure if I am doing it right, but I am definitely going to keep practicing.  What do you think?


Photography 101- ISO

Just a recap…so far in our photography 101 course, taught by the wonderful Aimee, we have covered…

the intro,

Nikon D3100 : Right

aperture (which I like to think of in terms of a blurry or a focused background),

shutter speed (which I like to think of stopping or showing motion),

and now we are moving on to ISO, the third part of the exposure triangle having to do with light and your camera!

ISO is your camera’s sensitivity to light.  The strength of light that can rush into a south facing room (glaring) versus the steady and diffused light coming into a north facing room is a good analogy.  If you live in the northern hemisphere…

So if you are photographing in a brightly lit, south facing room at noon, you don’t need your ISO to help so you can set it low (100 or 200).  If you are in a north room and it is overcast, ISO can help absorb more light if it is set medium (400-800).  And if you are losing light, set it high (1000 and up).  This is very helpful in places that do not allow flash, or if you do not want to use flash, but are in a low light situation.  Your camera can actually absorb a bit more light when you need it to.

Beware, though, because higher ISO settings can cause ‘noise’ or ‘grain’ in your pictures.

On your camera’s menu button, change the white balance to auto, and then choose P on the mode dial.

Nikon D3100 : Top

There is no ISO button on the back of my camera, so I have to access ISO through the menu.

You can see how the pictures become quite grainy by the end.

I am going to continue practicing all three elements from the exposure triangle in order to become even more comfortable with them, but I am finding that these exercises are really helping me to make sense of what my camera can do.

Thanks Aimee!!!